Friday, March 30, 2012

Scrapp'n Savvy Blog Hop

Welcome to the Scrapp'n Savvy Blog Hop! During this hop, you will learn about each teachers classes at the store and be eligible to win FREE class sessions. To enter, you must leave a comment on EACH teachers' blog and then return to the Scrapp'n Savvy blog and leave a comment that you have completed the hop. We will also be sharing with you information about our classes and techniques and tips that we used to create our "HOME" banners!

Here are a few pictures of my banner:


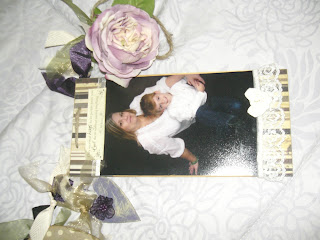
And for those of you that know me, you won't be surprised to learn that I will be creating a new addition to correspond to the holiday or other theme each month throughout the year.  I added a picture of my sweet grandson on the end of this one. I will change them out when I change the other decorations.  So .... make sure you come back often, or follow me and you will see the changes as soon as I add them.  :-)

I will post more details about my banner later this weekend.  While you are in Scrapp'n Savvy you might pick up some of those wonderful "Clear Scraps" Acrylic shapes and banners ... you will see them again soon.  (I need an Easter addition right away!)


I will be teaching Fast, Fun, and Done this quarter.  In this class we create 3 single pages and I provide you with a design for the coordinating layout along with basic instructions and cutting details so that you can "quickly" create that page too.  I will also teach the Yo-Yo Magic class in May and we will create a patriotic banner (with several styles of Yo-Yo's).  Here are a couple pictures from the layouts from Fast, Fun, and Done this past quarter.  The last set also included heart Yo-Yos.


Thanks for stopping by my blog today. Be sure to comment on each of the blogs listed below for your chance to win a free class!  Winners will be chosen on Wednesday, April 4. 
 
Happy Hoppin'

Baked Apples, Dessert 3/2/2012

Baked Apples

6 servings

Ingredients:
2 tablespoons butter, softened
1/3 to 1/2 cup sugar or brown sugar 

     (see notes for honey/agave substitution)
2 teaspoons cinnamon

1/2 teaspoon nutmeg
A pinch of sea salt (optional)

1.5 teaspoon vanilla extract
1.5 – 2 cups apple juice or cider

Water and lemon juice – if needed

Directions:
©      Use a fork to combine the butter, sugar, cinnamon, and nutmeg.
©      Cut the top off of each apple, and core (use a melon baller or apple corer) being careful not to go all the way through the apple.
©      Pop the cored apples into a bowl of water with a few tablespoons of lemon juice to keep from them turning brown.  This is a handy trick in case you have distractions while prepping the apples J
©      Divide the butter mixture between each apple, by placing the mixture in the hallowed out cores. Add another sprinkle of cinnamon to the apples.
©      Place the tops back onto the apples and place in a casserole dish.
©      Pour the apple juice into the pan and cover with foil or lid.
©      Bake for about 45 minutes (to an hour) at 325° or until apples are tender.
©      Serve with ice cream or top with whipped cream and a sprinkle of cinnamon and nutmeg. 

Slow Cooker Method
©      Place the stuffed apples into the slow cooker and pour apple juice into slow cooker.
©      Bake on low for 6 to 8 hours.

Stove Top Method
©      Place the stuffed apples into a heavy pan deep enough to place apples in and still cover.
©      Pour the apple juice and vanilla into the pan.
©      Cover and cook on low for 35-45 minutes, or until apples are tender.

NOTES:
©      If you like DRIED FRUIT, add 1 -2 teaspoons of raisins, cranberries, or dried cherries per apple and mix with butter and spices, then fill apples.
©      If you prefer HONEY or AGAVE,  simply core apples, then sprinkle insides with cinnamon and nutmeg, add dried fruit if desired, then drizzle in 1 -2 teaspoons of honey or agave, add 1 teaspoon of butter, cover apple with top and bake using desired method.
©      Baked apples are wonderful with oatmeal, granola and yogurt, or pancakes for breakfast.
©      If your apples are sweet (or you are trying to avoid additional sugars of any kind) you can simply sprinkle with cinnamon and nutmeg and bake.
©      Finally, if you need a quicker dessert, melt butter in pan, add sliced apples, sprinkle with cinnamon and nutmeg.  Cook for 15 to 20 minutes.

Friday, March 9, 2012

Karen Burniston's Mini-Album Finished

Drum roll please ... I finished it, I mean, it is really finished with PICTURES even!  Yeah me!!! And WOW ... Karen Burniston I LOVE this little gem of an album.  You can find details here.  We made the album in Karen's class last Saturday at Scrapp'n Savvy and I was determined NOT to add it to my ever growing pile of unfinished projects. About half way through the class I knew what pictures I wanted to use.  My darling daughter took sweet rambunctious Sydney, the Australian Shepperd with us when she had her bridal portraits taken.  Jamie wanted to give her husband to be a picture of his two girls as her gift to him.  I think you will agree, they were adorable.


Front of the Mini-Album - I used Karen's NEW Love Set Sizzlits, coming to your LSS in June,(thank you Karrie) with Glossy Accents on the LOVE and some bling.


Okay ... so I had to add some bling (Heidi Swapp's Joy ... from my stash) and make a few Yo-Yo's (Come by Scrapp'n Savvy and I will teach you how to use Clover's wonderful Yo-Yo makers.)
I don't know why I decided to silhouette the picture of Jamie and Sydney!


And some more bling, hearts this time from my stash.


Acrylic Tag opens to reveal ...


So, I fell in love with the Maya Road Trim and heart pins and HAD to use them!!!


And more Maya Road Trim ... love the ribbon roses.


Wait for it ...


Karen's Sizzix 656024 Pop-up Ball and the heart paper clip is from


Isn't my baby beautiful?  Sorry about the glare.  Don't you just adore that Maya Road denim trim?
Thank you for another great project Karen Burniston.
The End!


Purse Treat Container

Purse Treat Container


This would be fun for a birthday or tea party even.  If you cut the top flap off, it creates a nice size treat box as well.


© Score your 6” x 11”.5 print or cardstock at 1.5”, 5”, 6.5” and 10”.

© Turn your paper and score the 6” side at 1” and 4. 5”.


© Cut slits up to the 1” score line.  Angle the cuts slightly to allow the box to close better.

© See diagram and cut away sections as shown.


© Use your favourite corner punch to round the corners, if desired.


© Use your red tacky tape on the flaps. (bottom and edge)

© Use your bone folder to create nice crisp folds.

© Remove tape backing and line up the corners.

© Decorate as desired (I LOVE the smaller prints on the 6” pads and the prints with 4 quarters) and the tiny tags and stamps.

© Add tulle to create a handle if desired, by punching 2 small holes along the back of the scored lines on the top flap.  Embellish with bling, flowers, etc. You will need to gently pinch the sides in at the top to close.  I used a brad and twine on mine.

© Fill with cookies, candy, and other treats.

© Enjoy!